|
Back to Blog
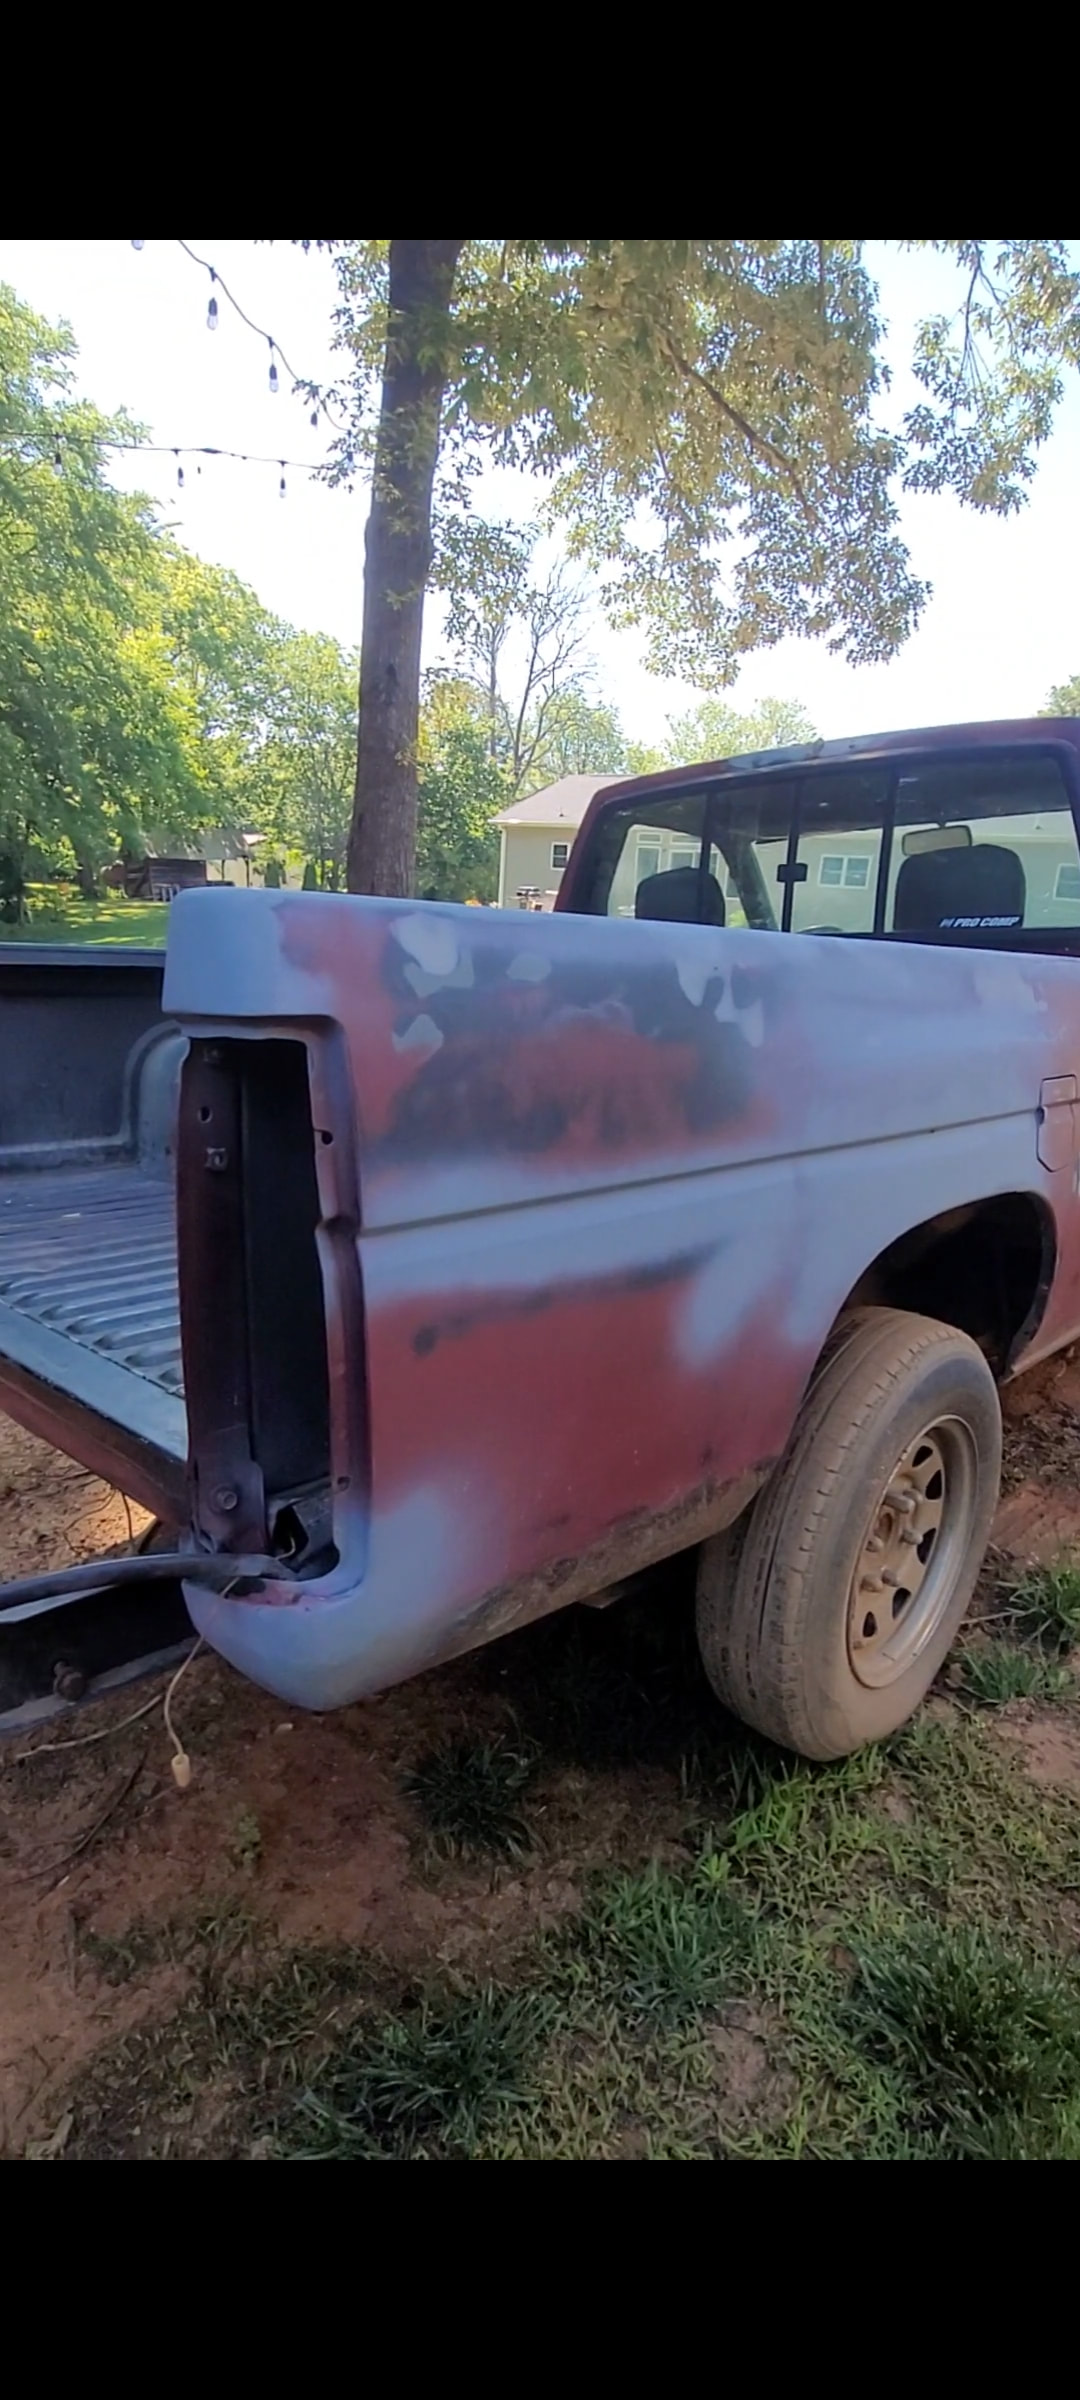
My main focus this week was getting the last of the bodywork on point as I cannot get the truck painted, so I need to have a smaller goal. That is getting the truck ready for paint/primer. I went to O'Reilly's to pick up some sandable primer. This is used to be able to better see minor imperfections, such as ones that you would see in your paint. It is hard to see these things without primer because the surface is so many different colors. This makes it very difficult to see shadows, divots, humps, etc.. Therefore, I needed to lay a coat of primer on my big problem areas to make sure that I had got them worked out to a comfortable place. I also primed the smaller areas such as the dent in the door and the roof. Another big thing that I did this week was weld in the holes on the bed rail and where the third brake light used to mount. I did this so that the surface would be flat, and so that water would not leak in between the metal in the truck. This is a very easy way to get a lot of rust if you aren't careful and fully seal off the holes. Welding these holes was very hard on as thin of metal as it was, especially trying to weld it with flux core. While I was welding, I had to have my temperature/power all the way down, and it was still immediately burning holes in the metal. I combatted this the only way I knew how which was to build up the material by basically tacking it a bunch of times and letting it cool in between each. This stopped it from getting so hot and burning through so easily. Lastly, I had to grind off the mounds of welds that I left on my truck. This was going well until I got to my 3rd brake light holes and realized that my welds were hollow. When I went to grind off the mounds of welds I had left, I ended up creating the same whole that was there before because the welds didn't fill in the hole, they made a hollow mountain over the hole.
0 Comments
Back to Blog
Week 11-Cardboard Car5/8/2024 Project for another class. This week, I was absorbed with a project that I procrastinated on doing for a tad bit too long. I had to spend all this week working on a cardboard car for automotive. Although, this does directly represent what I am working on for my project, it is still beneficial to me learning and gaining problem solving skills. Throughout this project, I had to make everything inside and out. I started by making a body. This would give me shape that I could build the interior and frame around. Next, I found a way to make it roll. For this I welded a couple of small studs together and then threw some washers on it, which is how it rolls. After having the wheel situation figured out (which was the hardest part), I worked on creating a model engine out of cardboard. I made a regular v8 engine with transmission and driveshaft to put in this car, and I feel that I did a VERY good job. I installed all of these things with hot glue. After finishing up all of this, I worked on making an interior. I used cardboard cut outs and napkins as the bolsters for the seats, this made the seats have a squishy realistic feeling. I then made a dash and got along to painting everything. I painted the body, frame, wheels, interior, and everything else. I used clear plastic from a container for the windows, and ordered a set of headlights off of amazon. I feel as if I did really good on this project.
Back to Blog
Week 104/29/2024 It was raining every day this week making it way too sloppy outside to move my truck, and way too wet to work outside.
Back to Blog
This entails some not so good news... As I was wrapping up body filler on the truck, I got the great idea to take my third brake light off because it would look better. This sounded like a great idea at first, and even now that I did it, I'm glad I did. I just wish I would have chose a different way of going about it. My first method, the method that went very wrong was using a 5lb mini-sledge and a small chisel to break the bracket free from the truck (the bracket was tac welded on). As I started to smack the bracket with the chisel, it was slowly coming off, so I continued. I continued until I was about 25% through taking it off and the chisel flew forward. Since I have not put my hood back on yet, that left a whole engine bay for this chisel to fly into. When I got off of the bed and went to the front of the truck to see what was damaged, I couldn't tell immediately. But, as soon as I saw my radiator leaking coolant, I knew exactly what had happened. This was going to be a couple hundred dollar mistake that I quite literally can't do anything about now. This was very irritating, as I could have used a sheet of cardboard to cover up my engine bay, or maybe even just put the hood back on since there was no reason that it was not ready. After doing a little bit of research, I found a radiator for the truck that only costs about a hundred bucks. This is a pretty good deal, although I could have saved myself from having to spend any money if I would have just been smart and covered up the engine bay. When I told my dad about this, he asked why I didn't use a cut-off wheel. As soon as he said this, I asked myself why I didn't use a cut-off wheel when I was first trying to get the bracket off. With the cut-off saw, I was able to remove the bracket within 5 minutes, and with very little effort. This was definitely a lesson learned. 
Back to Blog
Weather is starting to warm up! I worked outside this week so that I could enjoy it. I knew that this area would be hard as the divot is almost 1/4 inch deep. I was worried about this because, when you get the filler to thick, I learned last week, it will just chip off, and you have to redo that whole area again. Luckily, I was able to fill the divots with only one major problem. On one of my thickest coats of putty, on the passenger side of the truck, I did not put enough hardener in the filler. This was a very big problem as it did half-way dry. This meant that I had to find a way to take it off, which was not easy at all. I knew that I couldn't try to sand it off as it would just clog the pores in the sandpaper as soon as it got a little heat to it. The way that I ended up doing it was taking a straight razor and skimming it off like they do to those ice cream rolls on the frozen tops. This was a very tedious process as I could not take that much off at a time. I eventually did get it all off. I then had to re-sand the area, clean it, and do putty all over again. Although, this time I made sure to put enough hardener in it. The driver side definitely went a lot more smoother than the passenger in the sense of complications. While I was working on these areas, I also hit up a couple of spots on my roof, passenger door, bed fenders, and front fenders. The only one of these that really took some time is the passenger door. I had a pretty big dent, right on a body line, that I had to try and fill. Except, instead of filling trying to make it flat, I had to build the bodyline back out. This was sort of complicated at first, but I realized I could lay on a little more than I needed and sand it down to get the shape I needed.
Back to Blog
Week 7-Body Filler on the Hood4/10/2024 This week was filled with learning. The weather was much nicer, although I got to work in the shop. I purchased a couple of different brands of body filler (Ever coat and Bondo) at O'Reilly's a couple weeks ago, and this week, I finally got to start using it. This week I was able to work in the shop, but it was becoming not such a big deal as the weather is getting nicer and it's warming up a little bit outside. The first thing that I did was read the instructions on the Ever coat filler. I chose to use this filler first because it was color changing. This means that when the putty is getting closer to and finishes setting, it will change colors. I figured that this would be helpful being that this is my first rodeo with body filler. That was one of the main reasons I bought the color changing putty as well. The instructions told me what ration of hardener to put in the putty. I learned that the ratio that is mentioned on the instructions is only a baseline. I fiddled with the ratio of hardener/putty the whole time I was working as to try to get the most optimal drying and work time out of it. The first step of applying the putty was cleaning the areas where I was going to be using it so that it would stick to the surface. Next, I mixed up a batch of Ever Coat putty with the recommended ratio of filler/hardener. When I went to apply the putty on the hood, I realized that the filler was already drying and did not give me enough time to work. I then had to mess with the amount of hardener I put in the filler so that I could successfully use the filler I was trying to use before it dried. On the next go round, I used quite a bit less hardener, and guess what? The filler putty did not dry, even after several minutes of sitting there, it was still as if it never had any hardener put in it. I worked on tweaking this ratio and getting the hood floated as best as possible. 
Back to Blog
Week 6-Hood Removal/Sanding the Hood3/29/2024 The worst part (imperfection/body wise) of the truck. The main reason that I took the hood off was so that I could thoroughly work around the whole thing. Having the hood off of the truck made the hood a lot more accessible as well as made it a lot easier to put it under light and see where all of the imperfections are. The first thing that I had to figure out was how/what needed to happen to get the hood off. After inspection, I noticed that there are 4 stainless steel bolts that hold the hood on, along with a hose for windshield washer. I realized that I would have to find a way to detach the hose. The best way I figured to do this was cut it, being that I am wanting to replace that hose anyway because it was rubber and it was brittle, therefore, I did not feel to bad when I cut it. I had my dad help me with the removal of the hood as it was fairly heavy, and there was not a good way to get it unbolted while holding it, if I was alone. After the hood was off, I did what I did to the rest of the truck and went over it with a light and a marker before I started sanding down on it. This helped me pick my points of priority being that there were a ton of imperfections in the hood. I repeated the process once again and got to the first sanding step, taking off a good bit of material. After I did that, I went back over it with a light, marked the areas again, and started over until all of the areas that could be solved by sanding were almost perfect. There are several divots that I am going to need to put filler putty in, but I got it sanded. 
Back to Blog
Week 5-Sanding the Driver Side3/20/2024 Yet again, another cold week. This week was not quite as bad, it got up in the 30s at night which made working a little better, although it was still very, very, cold. Although, I still got the whole driver side of the truck sanded down. I executed this task just as I did last week, on the passenger side. I started by taking off as much material as I felt was needed to get a good perspective on what needs to be done. In some areas, just like the passenger side, I did make it to metal. As I explained in the previous blog post, this means that there is a uneven area, whether it be a spot that is too high that would show because it got sanded down faster than the surrounding areas because it was protruding, or if it is making a bare metal circle because of a low spot. This happens/happened for the same reason that the high spot does, the sander will sand down the whole area, but if there is a low spot, the sander will not hit it. While I was already in motion, I decided that I would try to clean up the bed rails and take at least some of the scars out of it. I did a fair job with this, though it did take a very long time as some of the scars were pretty deep. To do this, I used a coarse/medium grit sandpaper (120-240 grit) to get the biggest of the scars out. This helped quickly take off material, meaning I did not have to stand there for several hours with a higher grit sandpaper trying to get the big scars out, they came out within 15 seconds each. After I had gotten the biggest of scars out, that's when I went over it with the 240 grit sandpaper, to get it just a tad bit more smooth than it was on the first go round. 
Back to Blog
Week 4-Sanding the Passenger Side3/13/2024 This week was a continuation of the very frigid work weather outside. The work for this week was very hard. This is for the same reason as the other week, the temperature. As I try to work when I have free time, that happens to be in the dark, when I do. The only way I could avoid this would be to work on this project before doing other homework, which doesn't feel like a very good thing being that I have time to work on this, as it is not due tomorrow, such as other homework. This does set me back a little bit because working in the cold is not easy. When I say cold, I mean it was in the 20s this week. This made my hands very stiff and hard to work with. Even with gloves on, working in this temperature was not cool. Although, I was able to finish with the first stage of sanding on the passenger side of the truck. I say the first stage because I will have to come back likely, multiple times to keep on getting the surface more and more decent. Sanding this week was fairly straightforward, I was just taking down what I needed to, to see the uneven areas through layers of paint. The way I did this was seeing in what fashion the layers of paint were layered. After I know this, I sanded down as evenly as possible and saw where different paints were showing in different places, showing me that there was either a hump or a divot in the metal. From there, I had to decide whether to wait to fill it or try to sand it down to be even. I started by sanding over each panel, taking a fair amount of material off, then I sanded down wherever it looked like I could sand to be even, and waited for the spots that needed filler. The worst areas on the passenger side were definitely right above the wheel well and a decent sized dent in the door. The dent in the door will have to be filled, though.
Back to Blog
Week 3-Needed Knowledge3/6/2024 So, last week, I talked about what all I had to go through to work out the sanding situation, this week I will still talk about what I experienced, but more so, in what ways I needed to understand and use the tools I was working with. The main thing that I have to understand, at this point, is in what order I need to do things. I also have to understand what the different grits of sandpaper do/are used for and how to properly take care of my sander. I know that there will be more that I need to know, just not at this very moment. The sandpaper is not very hard to understand, the higher the grit, the finer the grit is, the lower the grit, the more coarse the sandpaper is. When the grit is coarse (below 120 grit), it will take off material very fast. This is helpful when you first start sanding to get down to whatever layer of the paint you want to be at (clearcoat being at the top, repaints/primer underneath, and primer on the very bottom right before bare metal). When the grit is fine (120-220 grit), it will make a much smoother surface than coarse sandpaper, but still not as smooth as extra fine grit (240+ grit). Fine grit sandpaper should be used after the coarse sandpaper to take out the bigger marks that are still left. After that is when you want to use the extra-fine grit sandpaper to get all of the small imperfections that are still left out. Imperfections meaning small scratches, sanding obviously won't fix areas that are uneven. The only other thing that I needed to know about sanding is what pattern to go in (circular), and maintenance of the sander. All that this consisted of is oiling after every use so that it didn't rust and cleaning out the holes of air flow with an air gun occasionally. 
Back to Blog
Week 2-Starting to Sand2/28/2024 I had to force myself to work this week, I really did not want to. The main reason being that it was 20 degrees outside while I was working! One of the first things that I did this week is make a trip to Harbor Freight as well as O'Reilly's. I picked up all of the things I needed that I didn't have such as a 6 1/2 in. palm sander, a can of Bondo filler putty, a can of ever coat filler putty, some putty knives, and a couple cans of spray primer. It was very hard to find time to work this week as it was raining almost all week. I did get a couple of clear night-time hours throughout this weekend. Although, these hours were very hard to work in. The weather was FRIGID, being I had to work outside to sand this week. In fact, I will have to work outside, likely, for most of the project. This is not going to be good as the weather is not going to good this winter. Anyways, I tried to stay as warm as possible by having a diesel heater pointed near me. This did help a little, although, my hands were still barely able to move. I did eventually put gloves on, which did help, just not very much. I worked right outside of the shop, under the lights that we have set up for the fire pit area. I did this in hopes that the lights would provide enough light for me to get some decent quality sanding in. This was not the case, I ended up grabbing a construction, stand-up light so that I could see what I was doing. I had to move this light as I worked down the side of the truck, which was not very easy as the legs were broken, so I had to tape them together and find a way to get it to stand up. 
Back to Blog
Week 1-Marking and Research2/21/2024 This week was pretty productive. I was able to work inside the shop since I wasn't sanding or doing anything messy yet. That was good so that I could stay warm while I worked as the temperature has been in the 20's. I started by marking out the obvious problem areas with a sharpie. To see these areas, I used a long light that I ran across the side of the truck to see where it was uneven. I tried to mark as many areas as I could, although I knew that I would definitely have to go through this process a couple more times to get out the rest of the imperfections. I noticed that the biggest problem areas, aside from the hood (which was just a bunch of small dents), were the backs of the fender wells on the bed. I knew that these would require a lot of time and energy, eventually. Even though the truck was very rough, some places worse than others, I was very surprised by how many dents there were not in places like the door and front fenders. I was expecting to have to put a lot of time into these areas as they are commonly dented areas, but there were only about 5 total dents throughout the sides of the doors and fenders. I then came inside and started doing some research on what materials/resources I needed to have that I did not already. After talking to my dad, who has a little experience with bodywork, and doing some research online, I was able to figure out what basic things I needed. I need filler putty, putty knives, an orbital sander, sanding pads, a ball peen hammer, a place to work, and a way to stay warm through the rest of this winter, because I know I will not be able to stay in the shop when I start sanding.  |